How to Adjust Bike Brakes (Step-by-Step Guide for Beginners)
Squeaky brakes, a lever that pulls almost to the handlebar before it grabs, or a rear brake dragging on the wheel every rotation, none of these mean you need a trip to the bike shop. Most brake issues come down to a simple adjustment you can make yourself in a few minutes with basic tools.
In this guide, we’ll cover how to spot the signs your brakes need attention, what tools you’ll need, and how to adjust both rim brakes and disc brakes step by step. By the end, you’ll know how to get your brakes feeling sharp and responsive again without paying for a shop visit.
Signs Your Brakes Need Adjusting
A few common symptoms point to brakes that need some attention. Squeaking, or a brake pad rubbing lightly against the wheel or rotor even when you’re not braking, is one of the most obvious signs.
Another common issue is a lever that pulls too close to the handlebar before the brake actually engages. This usually means the cable has stretched slightly over time and needs to be tightened.
You might also notice uneven stopping power between the front and rear brake, or a lever that feels loose or spongy instead of firm. Any of these are good reasons to check your brake adjustment before your next ride.
Tools You’ll Need
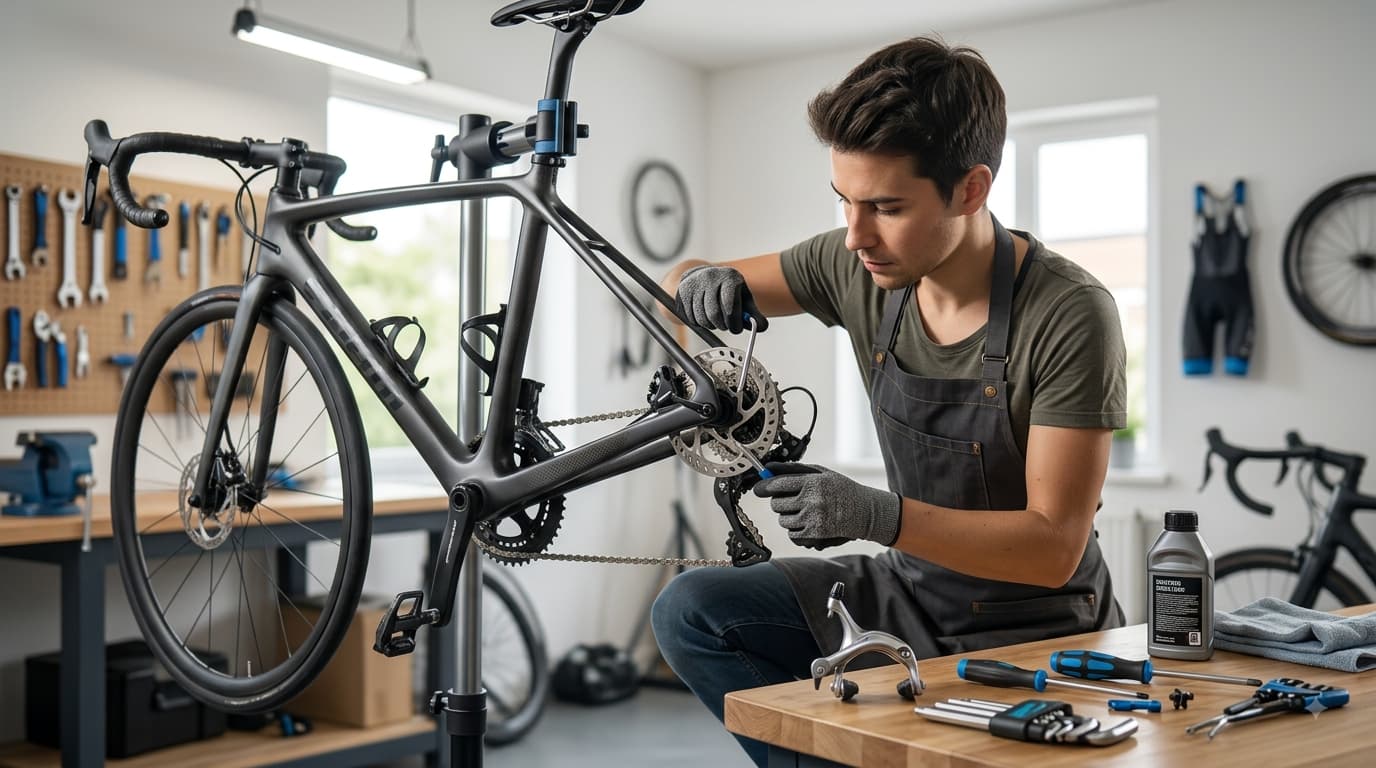
Most brake adjustments only require a small set of tools. An Allen wrench set covers most of what you’ll need, with 4mm and 5mm being the most common sizes for brake bolts. Needle-nose pliers come in handy for pulling cable slack tight while you’re adjusting.
A bike stand isn’t required, but having some way to prop the bike up so the wheels spin freely makes the whole process easier. If you’re trimming excess cable or housing, a pair of cable cutters is useful too, though most basic adjustments won’t need this.
Understanding Your Brake Type
Before you start, it helps to know which type of brake you’re working with, since the adjustment process is different for each.
Rim brakes use a caliper that squeezes directly against the wheel rim. These are common on road bikes, older mountain bikes, and a lot of hybrid or commuter bikes.
Disc brakes squeeze a rotor mounted near the wheel hub instead of the rim itself, and they come in two types: mechanical (cable-actuated, similar to rim brakes) and hydraulic (fluid-actuated, similar to a car’s braking system). Disc brakes are standard on most newer mountain bikes and increasingly common on road and gravel bikes too.
Knowing which type you have before you start saves you from following the wrong steps and getting frustrated halfway through.
Adjusting Rim Brakes
Start by checking pad alignment. Squeeze the lever slowly and watch where the pads make contact. They should hit the rim evenly, not the tire above it or the spokes below it. If the pads are misaligned, loosen the small bolt holding each pad in place, reposition it, and retighten.
Next, check cable tension using the barrel adjuster, the small dial usually located where the cable enters the brake lever or caliper. Turning it counterclockwise tightens the cable, bringing the pads closer to the rim, which helps if the lever feels like it’s pulling too far before engaging.
If the barrel adjuster alone doesn’t give you enough range, you’ll need to adjust the cable directly. Loosen the pinch bolt on the caliper (the bolt that clamps the cable in place), pull the cable slightly tighter with your pliers, then retighten the pinch bolt while holding the cable in position.
After adjusting tension, check that the caliper is centered so both pads hit the rim at the same time. Most calipers have a small centering screw for this, or you can gently nudge the caliper body by hand and retighten the mounting bolt once it’s centered.
Finish by testing the lever feel. It should engage firmly with a bit of squeeze left before hitting the handlebar, and the pads should sit close to the rim without rubbing when you spin the wheel.
Adjusting Mechanical Disc Brakes
Start by checking rotor alignment. Spin the wheel and look (and listen) for the rotor rubbing against the brake pads. A rotor that’s bent will rub at one specific point in the rotation, while a caliper that’s off-center will cause rubbing throughout the whole spin.
If the caliper seems off-center, loosen the two bolts holding it to the frame or fork slightly, squeeze the brake lever and hold it while you retighten the bolts. This lets the caliper self-center around the rotor as you squeeze.
From there, use the barrel adjuster or cable tension bolt (location varies by brake model) to bring the pads closer to the rotor if the lever feels loose. Many mechanical disc calipers also let you adjust the inner and outer pad position separately, which is worth checking if one side of the caliper seems closer to the rotor than the other.
A Note on Hydraulic Disc Brakes
Hydraulic disc brakes work differently from the other types we’ve covered. Instead of a cable, they use fluid pressure to push the pads against the rotor, and this system self-adjusts as the pads wear down over time. That means you generally won’t need to manually tighten anything as your pads wear, unlike with rim brakes or mechanical disc brakes.
What you can still adjust on most hydraulic brakes is lever reach, meaning how far the lever sits from the handlebar, and on some higher-end models, the point in the lever’s pull where the pads make contact.
If you’re dealing with a spongy lever feel or a noticeable drop in stopping power on hydraulic brakes, that usually points to air in the brake line or a fluid leak, and this isn’t something to troubleshoot with basic tools. This is a case where a bike shop visit makes more sense than a DIY fix.
Testing Your Adjustment
Once you’ve made your adjustments, it’s worth testing everything carefully before heading out for a real ride.
Squeeze each lever and check that it engages with some room left before hitting the handlebar, not right up against it and not so loose that it barely grabs. Spin each wheel and listen and watch for any rubbing against the rim or rotor.
After that, walk the bike a short distance and test the brakes at low speed, checking that stopping feels solid and even on both wheels. If anything still feels off, go back and make small adjustments until it feels right, rather than heading out and hoping for the best.
Common Mistakes to Avoid
A few mistakes come up often enough that they’re worth calling out directly.
Over-tightening cable tension is a common one, since it can pull the pads so close to the rim or rotor that they rub constantly, even when you’re not braking. Forgetting to center the caliper after making other adjustments is another frequent issue, and it leads to one pad dragging while the other barely makes contact.
It’s also easy to adjust around a problem instead of fixing it, like tightening cable tension repeatedly instead of noticing that the pads are actually worn down and need replacing. And skipping a test ride before heading out on the road or trail is a mistake that can turn a minor adjustment issue into a real problem at the worst possible moment.
When to Take It to a Bike Shop Instead
Some issues go beyond a basic home adjustment. Hydraulic brake bleeding, meaning removing air bubbles from the fluid line, requires specific tools and fluid that most home mechanics don’t have on hand. The same goes for fluid leaks, which need a proper seal repair rather than a quick fix.
A bent rotor that won’t true up with careful bending by hand is another sign it’s time for a shop visit, since riding on a warped rotor causes uneven braking and ongoing rubbing no matter how you adjust the caliper. And if you’ve made several adjustment attempts and the brakes still aren’t behaving the way they should, it’s often faster and safer to let a mechanic take a look rather than keep guessing.
Final Thoughts
Most brake issues turn out to be a five-minute fix once you know what you’re looking at, whether that’s a quick barrel adjuster tweak or centering a caliper that’s drifted slightly off. Building a habit of checking your brakes regularly, before long rides especially, means you’ll catch these small issues before they turn into bigger problems or, worse, a brake failure at the wrong moment.